How to Upload Your Existing Local Project to GitHub
Have you started coding a project on your computer but haven't put it on GitHub yet? This guide shows you the safest and easiest way to turn your local folder into a Git repository and push it to the cloud.
The Scenario
You have a folder on your computer (maybe created in VS Code or PyCharm) full of Python code. It works locally, but now you want to save it to GitHub to keep it safe or share it.
Here is the step-by-step process.
Step 1: Initialize Git
First, open your terminal inside your project folder.
- VS Code: Press
Ctrl + `to open the terminal. - PyCharm: Click the Terminal tab at the bottom.
Type this command to tell your computer "This folder is now a project":
git initStep 2: Create a .gitignore File (Very Important!)
Before you save anything, you must tell Git which files to ignore. In Python, you never want to upload your virtual environment (venv) or compiled files (__pycache__).
Create a new file named .gitignore and add these lines:
venv/
.env
__pycache__/
.idea/
.vscode/
*.pyc- Tip: If you skip this, you might accidentally upload thousands of useless files!
Step 3: Save (Commit) Your Files
Now, let's stage and save your current work.
1. Add all files to the staging area
git add .
2. Save them with a message
git commit -m "Initial commit"
Step 4: Create a Repository on GitHub
- Go to GitHub.com and log in.
- Click the + icon in the top right and select New repository.
- Repository name: Give it the same name as your folder (e.g.,
my-python-project). - Privacy: Choose Public or Private.
- Do NOT check "Add a README" or ".gitignore" (since we already made them locally).
- Click Create repository.
Step 5: Connect and Push
GitHub will show you a page with commands. Look for the section titled "…or push an existing repository from the command line".
Copy and run these three commands in your terminal one by one:
1. Rename your branch to 'main' (standard practice)
git branch -M main2. Link your local folder to GitHub (Replace URL with your own!)
git remote add origin https://github.com/YOUR_USERNAME/YOUR_REPO_NAME.git3. Push your code
git push -u origin mainSuccess!
Go back to your GitHub page and refresh it. You should now see all your code listed there.
From now on, whenever you make changes, you just need to run:
git add .git commit -m "message"git push
You Might Also Like
 Git & GitHub
How to Use the git cherry-pick Command (A Beginner’s Guide)
What is "Cherry Picking" in Git?Imagine you have a basket of fruit (a branch of code) with apples, oranges, and bananas. You want to make a fruit salad (a new feature), but you only want the oranges—not the apples or bananas.In Git terms, cherry-pick allows you to pick one specific commit from one branch and apply it to another branch, without merging the entire messy history. It is a lifesaver when you fix a bug in the "Development" branch and need to push just that fix to the "Production" branch immediately, without releasing all the unfinished features. When Should You Use It?Hotfixes: You fixed a critical bug on a feature branch and need it on the main branch right now.Undoing Mistakes: You accidentally committed to the wrong branch. You can cherry-pick that commit to the correct branch and delete it from the wrong one.Selective Features: You want one specific feature from a teammate's branch but don't want their other half-finished code. Step-by-Step ExampleLet's say you have two branches:main (The clean code)feature-login (Where you are building a new login system)You fixed a typo in feature-login and you want that typo fix in main, but the rest of the login system isn't ready yet. Step 1: Find the "Commit Hash" First, go to the branch that has the commit you want (the source). git checkout feature-login git log --onelineYou will see a list like this: a1b2c3d Fixed the typo in header (This is the one we want!) e4f5g6h Added login button i7j8k9l Started working on login formCopy the code (Hash) for the commit you want. In this case, it is a1b2c3d. Step 2: Switch to the Target BranchNow, go to the branch where you want to paste this commit.git checkout main Step 3: Run the Cherry Pick Command Run the magic command with the hash you copied: git cherry-pick a1b2c3d That’s it! Git just took that specific change and applied it to your main branch. It is now a part of your main history. How to Handle Conflicts Sometimes, Git gets confused. If the file you are changing is different on both branches, you will see a "Conflict" error. Don't panic. Here is the fix:Check status: Run git status to see which file is red (conflicted).Open the file: You will see symbols like <<<<<<< and >>>>>>>. Delete the lines you don't want and keep the correct code.Add the file: git add filename.py 4 . Finish the pick:git cherry-pick --continue SummaryCommand: git cherry-pick <commit-hash>Use it for: Moving specific bug fixes or features without merging unrelated code.Caution: Don't overuse it! If you cherry-pick too much, your project history can become confusing. Use it only when necessary. Video Tutorial If you prefer a visual walkthrough, this video explains the process clearly. GIT CHERRY PICK Tutorial This video is relevant because it visually demonstrates how to find commit hashes and resolve merge conflicts that often happen during cherry-picking.
 Git & GitHub
Secure Your Code: How to Enable Two-Factor Authentication (2FA) on GitHub
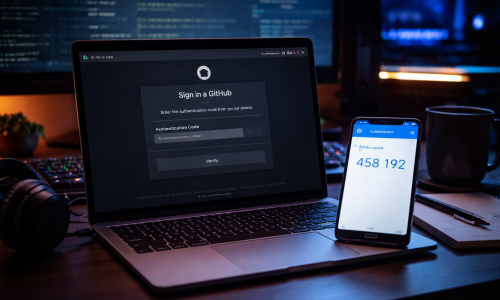
WHY DO YOU NEED THIS?Have you ever heard horror stories of developers losing access to their own projects because someone guessed their password?Two-Factor Authentication (2FA) adds a second lock to your door. Even if a hacker steals your password, they still can't get in without your phone.Plus, GitHub has started forcing active contributors to turn this on. If you don't do it, you might get locked out of your account eventually!Here is how to set it up in less than 5 minutes.---------------------------------------------------------------------------STEP 1: DOWNLOAD AN AUTHENTICATOR APPBefore you touch GitHub settings, get your phone ready. While you can use SMS (text messages), it is often delayed or unreliable. The professional standard is an Authenticator App.• IPHONE: Search for "Google Authenticator" or "Microsoft Authenticator" in the App Store.• ANDROID: Search for "Google Authenticator" in the Play Store.Download and install it now.---------------------------------------------------------------------------STEP 2: GO TO GITHUB SECURITY SETTINGS1. Log in to GitHub.com on your computer.2. Click your PROFILE PICTURE in the top-right corner.3. Select SETTINGS.4. On the left sidebar, look under the "Access" section and click PASSWORD AND AUTHENTICATION.---------------------------------------------------------------------------STEP 3: ENABLE 2FA1. Scroll down to the "Two-factor authentication" section.2. Click the green button: ENABLE TWO-FACTOR AUTHENTICATION.3. GitHub will ask how you want to do it. Select SET UP USING AN APP.---------------------------------------------------------------------------STEP 4: THE MAGIC SCAN (LINKING YOUR PHONE)GitHub will now show you a QR CODE (a square barcode) on your computer screen.1. Open the Authenticator App on your phone.2. Tap the + (PLUS) button to add a new account.3. Select SCAN A QR CODE.4. Point your phone camera at your computer screen.5. Your phone will immediately generate a 6-DIGIT CODE (like 123 456) that changes every 30 seconds.---------------------------------------------------------------------------STEP 5: VERIFY THE CODEType that 6-DIGIT CODE from your phone into the box on the GitHub webpage.---------------------------------------------------------------------------STEP 6: SAVE YOUR RECOVERY CODES (CRITICAL!)Once verified, GitHub will show you a list of "Recovery Codes."⚠️ STOP! READ THIS: If you lose your phone, break your phone, or delete the app, YOU WILL BE LOCKED OUT OF GITHUB FOREVER unless you have these codes. GitHub Support cannot restore access for you.• DOWNLOAD the file.• PRINT them out and put them in a drawer.• EMAIL them to yourself.• DO WHATEVER YOU MUST DO TO KEEP THEM SAFE!Click "I HAVE SAVED MY RECOVERY CODES" to finish.---------------------------------------------------------------------------YOU'RE DONE!Now, whenever you log in to GitHub on a new computer, it will ask for your password and the code from your phone app. Your code is now safe!---------------------------------------------------------------------------VIDEO TUTORIALIf you prefer watching a video guide, this one walks through the exact process:HOW TO ENABLE 2FA ON GITHUBThis video is relevant because it visually demonstrates the exact steps described above, including where to find the settings and how to handle the crucial recovery codes.
 Git & GitHub
GitHub Password Not Working? How to Create a Personal Access Token (PAT) in 5 Easy Steps
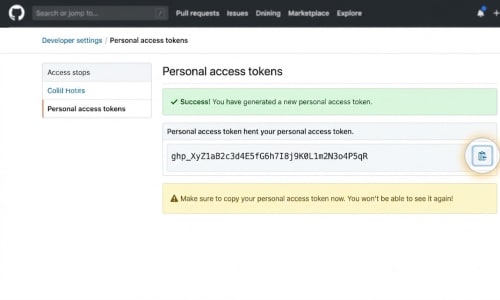
The Problem: "Support for password authentication was removed"Have you tried to push your code to GitHub recently, only to see an error message in your terminal that looks something like this? remote: Support for password authentication was removed on August 13, 2021. Please use a personal access token instead. If so, don't panic. Your account isn't broken, and you didn't forget your password.A while back, GitHub changed the way it handles security for the command line. They no longer allow you to use your regular website password to push code. Instead, you need something called a Personal Access Token, or PAT. What is a PAT? (A Simple Analogy)Think of your main GitHub account password like the master key to a hotel. It can open every door, access billing information, and change important settings. You don't want to give that master key to the delivery driver dropping off pizza.A Personal Access Token (PAT) is like a temporary guest key card.It only opens the specific room you tell it to (like just your code repositories).It can expire automatically after a certain number of days.If someone steals it, they can't change your main account password or delete your account. It is much safer for your computer to use this "guest key" when talking to GitHub.Here is the easiest, step-by-step way to create one. Step 1: Navigate to SettingsLog in to GitHub.com.In the very top-right corner, click your profile picture.In the menu that drops down, click Settings. Step 2: Find Developer SettingsThis part is hidden a little deep in the menu.Look at the sidebar menu on the left hand side of the screen.Scroll all the way down to the very bottom.Click the last option: Developer settings. Step 3: Choose Personal Access TokensOn the new left sidebar, click on Personal access tokens.You will see two options appear below it: "Fine-grained" and "Tokens (classic)".For the easiest setup that works with most tools, click Tokens (classic).Click the button in the center of the page that says Generate new token (select "classic" again if prompted). (Note: You may be asked to confirm your GitHub password here for security). Step 4: Configure the Token DetailsNow you need to tell GitHub what this token is for.Note: Give it a name so you remember what it is. Something like "Laptop Command Line" or "VS Code access".Expiration: This controls how long the token lasts.Recommendation: For security, set it to 30 days or 90 days. Avoid choosing "No expiration" unless you absolutely have to. You can always generate a new one later.Select scopes: Scopes are permissions. You are telling the token what it is allowed to do.The simple option: If you just want to push and pull code from your repositories, simply check the very first box that says repo (Full control of private repositories). This will automatically check all the sub-boxes under it. That is usually enough for day-to-day coding. Step 5: Generate and COPY IT IMMEDIATELYScroll to the bottom and click the green Generate token button. ⚠️ THIS IS THE MOST IMPORTANT STEP ⚠️GitHub will now show you your new token. It looks like a long string of random letters and numbers (usually starting with ghp_). You must copy this token right now.Click the little clipboard icon next to the token to copy it. Paste it somewhere safe immediately (like a password manager).Why the urgency? As soon as you leave this page or refresh it, you will never be able to see that token again. GitHub does not save it for you. If you lose it, you have to delete it and start over. How to Use Your New PATThe next time you try to push code to GitHub from your terminal, Git will ask for your username and password.Enter your GitHub username normally.When it asks for your password, do not type your regular account password. Instead, paste the long token you just copied.Tip: When you paste into a terminal, you often won't see anything appear on the screen for security reasons. Just paste it and press Enter.That’s it! Your code will push successfully, and your computer will usually remember the token for next time.