How to Install Ubuntu 24.04 LTS: The Ultimate Step-by-Step Guide (Dual Boot Supported)
Ubuntu is the most popular open-source operating system in the world. Whether you are a developer, a student, or just someone who wants a fast and secure computer, Ubuntu is the perfect choice.
In this detailed guide, we will walk you through the entire process of installing Ubuntu 24.04 LTS (Noble Numbat) on your PC or Laptop. We will also cover how to keep your Windows data safe if you want to use both (Dual Boot).
Phase 1: Preparation (Don't Skip This!)
Before we start, you need a few things:
- A USB Pen Drive: Minimum 8GB or 16GB. (Note: All data on this USB will be deleted).
- The ISO File: Download the latest Ubuntu Desktop LTS image from the official website.
- Rufus (for Windows): A small software to make your USB bootable. Download it here.
Backup: If you are installing this on your main computer, please backup your important files to an external hard drive or Google Drive. Better safe than sorry!
Phase 2: Creating the Bootable USB
First, we need to turn your normal USB drive into an Ubuntu installer.
- Plug in your USB drive.
- Open Rufus.
- Device: Select your USB drive.
- Boot selection: Click "SELECT" and choose the Ubuntu ISO file you downloaded.
- Partition scheme:
- Select GPT (if your computer is new/UEFI).
- Select MBR (if your computer is very old/Legacy BIOS).
- Click START. Rufus will warn you that all data on the USB will be destroyed. Click OK.
Wait for the process to finish (it takes about 5-10 minutes).
Phase 3: BIOS Settings and Booting
This is the tricky part where most people get stuck. We need to tell your computer to start from the USB, not the Hard Disk.
- Shut down your computer completely.
- Turn it on and immediately start pressing the Boot Menu Key.
- HP: F9 or Esc
- Dell: F12
- Lenovo: F12 or Fn+F12
- Asus: F8 or Esc
- Acer: F12
- In the Boot Menu, you will see your USB drive (e.g., "UEFI: SanDisk"). Select it and press Enter.
Tip: If you don't see the USB, you might need to go into BIOS settings (F2 or Del) and disable "Secure Boot."
Phase 4: The Installation Process
Once the black screen with the Ubuntu logo appears, follow these steps:
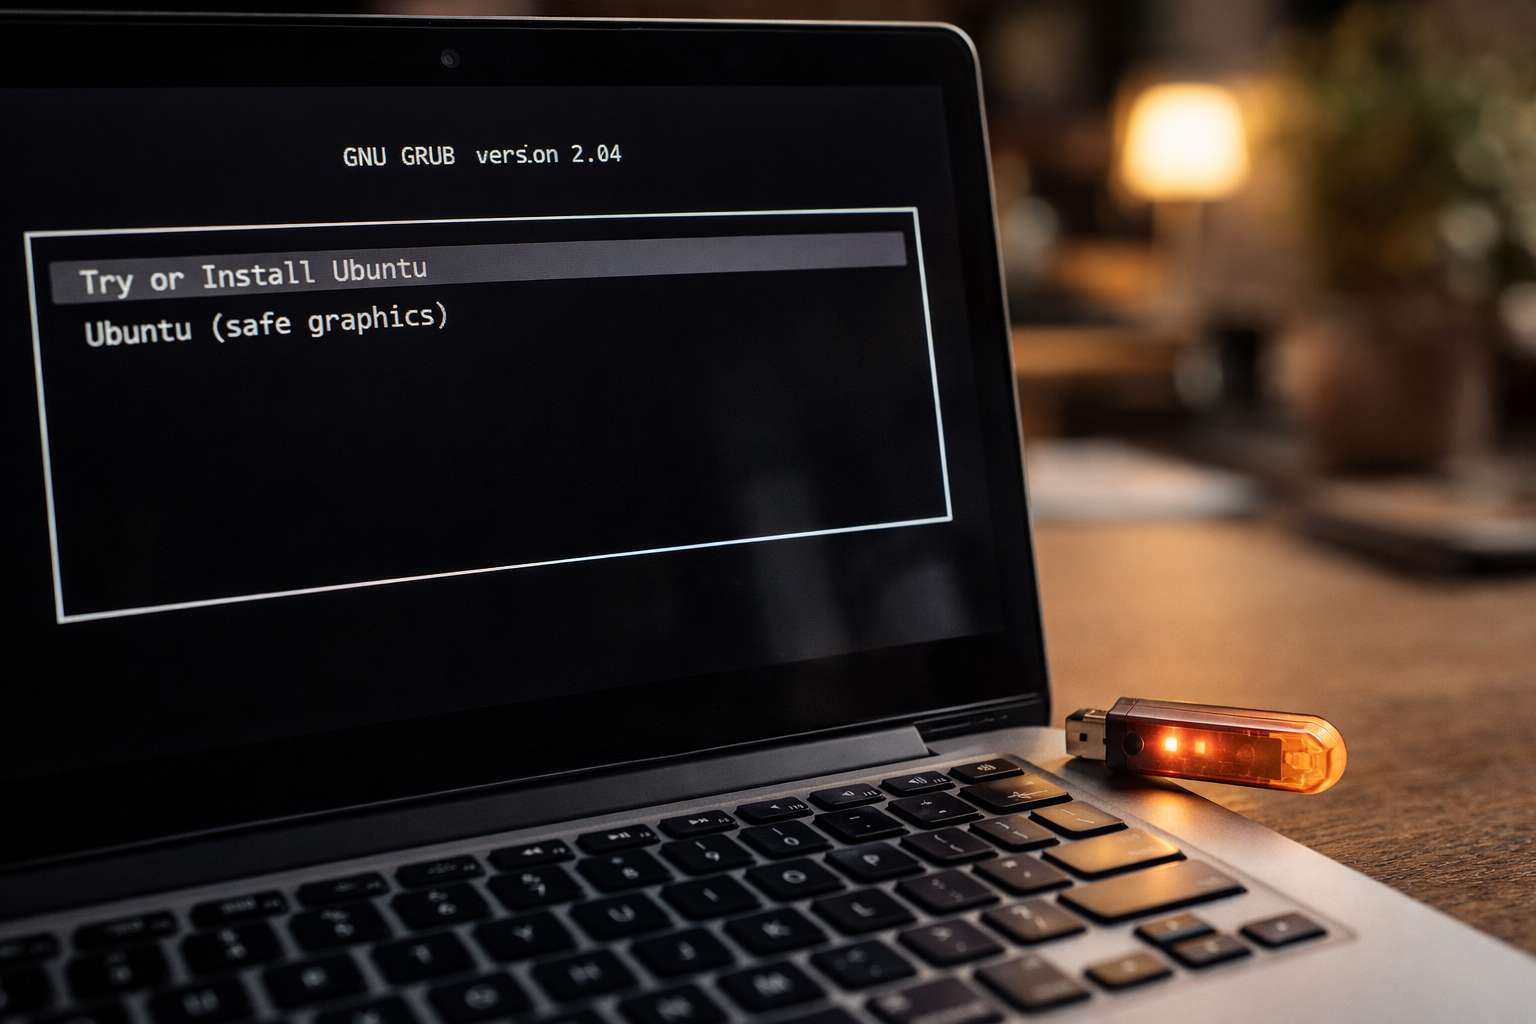
Step 1: Try or Install
You will see a welcome screen.
- Try Ubuntu: This lets you use the OS without installing it. Great for testing wifi/sound.
- Install Ubuntu: Click this to start the actual installation.
Step 2: Keyboard Layout
Choose your keyboard style.
- Standard: English (US)
- Click Continue.
Step 3: Updates and Other Software
- Normal Installation: Installs web browser, utilities, office software, games, and media players. (Recommended).
- Minimal Installation: Installs only the web browser and basic utilities.
- Check the box: "Install third-party software for graphics and Wi-Fi hardware." (Crucial for playing videos and using Wi-Fi).
- Click Continue.
Step 4: Installation Type (Critical Step!)
Here you have two main choices:
Option A: Erase disk and install Ubuntu (Clean Install)
- Warning: This deletes Windows and ALL your files.
Use this if you want only Ubuntu on your laptop.
Option B: Install Ubuntu alongside Windows Boot Manager (Dual Boot)
- Use this if you want to keep Windows and choose between Windows/Ubuntu every time you turn on the PC.
The installer will ask you to drag a slider to choose how much space to give Ubuntu (e.g., 50GB).
Option C: Something Else (Manual Partitioning)
Only for experts. You manually create partitions like
/(Root),/home, andswap.
Select your option and click Install Now. A popup will ask to confirm writing changes to the disk. Click Continue.
Step 5: Who Are You?
- Where are you? Select your time zone (e.g., Kolkata) on the map. Click Continue.
- Your Details:
- Your name: Enter your full name.
- Computer's name: Give your PC a cool name.
- Username: Pick a short username (lowercase).
- Password: Create a strong password. Do not forget this! You will need it to install apps later.
Phase 5: The Final Wait
Now, the installer will copy files and setup the system.
- This takes about 10 to 20 minutes depending on your internet speed and hard drive (SSD is faster).
You will see a slideshow of Ubuntu features.
The Finish Line: Once done, a message will pop up: "Installation Complete."
- Click Restart Now.
- The screen will say: "Please remove the installation medium, then press Enter."
- Pull out your USB drive.
Press Enter.
Conclusion
Congratulations! Your computer will now reboot into your brand new Ubuntu desktop.
What to do next?
- Connect to Wi-Fi.
- Open the "Software Updater" and install the latest patches.
Open the terminal (
Ctrl+Alt+T) and run your first command:
sudo apt update && sudo apt upgrade
Welcome to the world of Linux!
You Might Also Like
 Tech Solutions
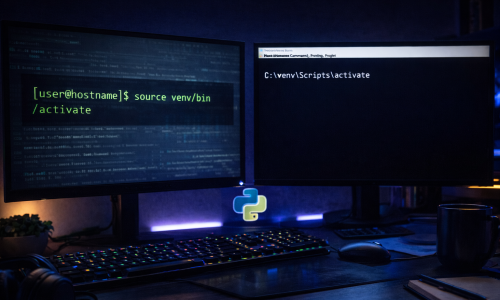
How to Create a Python Virtual Environment on Ubuntu and Windows
If you are a Python developer, using a Virtual Environment is one of the most important habits to learn. It allows you to create an isolated space for your project, ensuring that the libraries you install for one project do not conflict with another.In this guide, we will show you how to set up a virtual environment on both Ubuntu (Linux) and Windows in the easiest way possibleWhat is a Virtual Environment? A virtual environment is a self-contained directory tree that contains a Python installation for a particular version of Python, plus a number of additional packages. It prevents "dependency hell" where different projects need different versions of the same library.Option 1: Setup on Ubuntu (Linux) Step 1: Install the venv package On Ubuntu, the virtual environment module often needs to be installed separately. Open your terminal and run: sudo apt update sudo apt install python3-venvStep 2: Create the Environment Navigate to your project folder and create the environment. We will name it "venv" (a common standard). python3 -m venv venv Step 3: Activate the Environment To start using it, you must activate it. source venv/bin/activate You will know it is working because your terminal prompt will change to show (venv) at the beginningOption 2: Setup on Windows Step 1: Open Command Prompt or PowerShell Navigate to your project folder using cd. Step 2: Create the Environment Windows usually comes with the venv module included in Python. python -m venv venv Step 3: Activate the Environment The command to activate looks slightly different on Windows: venv\Scripts\activate venv\Scripts\Activate.ps1 Note: If you get a permission error in PowerShell, run Set-ExecutionPolicy Unrestricted -Scope Process to allow the script to run.How to DeactivateWhen you are done working, you can exit the virtual environment by simply typing: deactivate Your terminal will return to normal, and you are free to switch to other projects!